
It's official ... I am a bit of a numpty! I did take my camera to Ally Pally ... I did n't take any pictures ... and if I had ... well you could n't see them anyway ... because I left said camera there!
So ... no pictures tonight I am afraid ... but Thank you all so much for wishing me well ... I had a wonderful time ... did lots of demos ... made lots of new friends ... met lots and lots and lots of bloggers ... and the best bit ... I get to do it all again tomorrow... Thank you to everyone who popped over to the stand to say Hi!
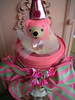
What I did discover today was that lots of people still want to know how to make roses ... so as promised ... here is a quick tutorial to get you on your way!

1. Stamp/die cut three 6 petaled flowers ... there are lots of stamps out there and dies ... dig through your stash ... you will be amazed how many you can find.

2. Find the centre of each flower ... this does n't have to be precise and cut as illustrated. One flower has one cut to the centre line. The next you remove one petal and finally remove a two petal segment from the third. You will need all these pieces to make your rose.

3. If you are working with normal card stock you can skip this step. But if you are working with Grungepaper you need to remove the top off each petal left of the cut on each of the three larger sections ... again as illustrated. These bits can be put to one side or in the bin ... you won't need them.

4. Now is the time to colour and stamp on your pieces. This way you will ensure you have no dodgy grey bits showing up in your final rose.

5. Take your three larger pieces and over lap a full petal onto the section where you have removed the petal end... they should look kind of cone shaped. Glue with Glossy Accents and clip. These will take about 10 minutes to set enough for you to finish your rose.


6. Take your two petal section ... patterned side facing you and curl the left petal back. Be nice and firm ... they call it paper but trust me ... it is very strong and the firmer you are the better the curl. The better the curl ... the better the rose!

7. Now roll the petal that you have just curled in towards the flat petal and form a cone shape as illustrated ... where this touches the second petal add some Glossy Accents and clip.

8. The final single petal just needs to be rolled. You don't need to glue this ... but if you clip it for a while it will hold it's shape better. As you make more roses ... you may want to change this step ... there are lots of tutorials out there ... just pick the method that is best for you. But starting out ... this is definitely the easiest way.

9. When your pieces are dry ... Curl all the petals back as in step 6. Cut the bottom off each section. Don't be frightened to cut a good amount off and sit them inside each other ... before gluing them to see how they lay. If your rose looks more like a cabbage ... cut a bit more off ... offset the petals ... imagine a real rose and just sit each piece inside each other. With the single petal roll it up tightly ... cut it in half and put it inside the cone of the two petal section ... this will form the centre of your rose. If you did n't stick it ... it will open just as far the the cone allows and gives your rose a nice centre.

10. Once you are happy with the way your rose is sitting ... glue each section together with Glossy Accents. These little flowers really are very simple to do and sooooo addictive ... Enjoy :0)
Righty-Ho ... another early start for me ... if you have any questions I will do my best to get back to you quickly ... and I promise to take piccies at Ally Pally today :0)
Have a good day and Thank you again for all your lovely comments.


23 comments:
Hi Linda! You were wonderful, and that's official!! We had a fabulous day. Hope we weren't too cheeky :-))
Glad you had a fab time Linda, and the rose tut is very clear ! Thanks.
Sounds like you had a great time...Fab tutorial, I'm going to try and make a metal one today...fingers crossed!!!
Have a great day..x
I can't believe you managed to get this written last night aftr AP - you must have super amounts of energy, I have only just woken up (it's 9am) and I was shattered! It was fab to meet you and good luck for today. hope you get a chance to have a look round a bit too ... I spent loads!!
Glad your day went well. At least they said "see you tomorrow" that's always a good sign!!
Great tutorial - thanks.
Burnice x
It was lovely to meet you at ally pally - I would be the daughter in law of the 1st lady you did the metal demo too (I was the one dashing around looking at other stalls whilst you showed her how to make all those beautiful pictures). We have already been playing with the purchases - so thanks. Thanks for the tutorial on the grungepaper roses as I have made the paper ones, but not opened my pack of grungepaper yet so that is really useful. Still think the idea about having lots of geo-caches by craft stores is grea t:)
Hi Linda, it was great to meet you IRL, you are just as genuine and fun as you seem on your blog. Hope today goes just as well for you x
Well I am waving Linda. I haven't been to Ally Pally (too far for me) but wanted to say 'well done' again for a WONdERFUL INSPIRING BLOG - you know I gleen every bit of inspiration from you time and time again and love your work with a passion. Thank you also for being MY FIRST follower on my blog, I am truly honoured.
I must must must get some grungepaper - your tutorials are brill.
BEST WISHES AND ENJOY - Gilly x
Hi Linda :D It was really lovely to meet you properly too. And you know what? I can definitely see the Julia Roberts resemblance :P We had a lovely day, have another fun one today.
Thanks for this rose tutorial - I will definitely have a try at this!
i'm so envious of all those that got to meet you IRL... one day my friend, one day....
glad you enjoyed it and hope today is as successful. sounds like you were on a high following all your initial butterflies - we had faith in you tho!!!
hugs
Paula x x x
Glad I looked in today as I have just stamped a rose ready to cut out and your tut is so clear, thanks Linda, can't wait to see the piccies xx
You're not the only numpty, Linda. I didn't twig that you'd be demoing on the LB Craft stand or I would have said hello. Glad you are enjoying it. I bought some fabulous ferro (graphite and iron) from Lin and have been painting my T!m cog die cuts.
you make them look sooo easy and so glad you had a good time too.
chriss x
Fabulous tutorial.
Lovely to meet you IRL Linda today, great to chat and talk about this and that. Enjoyed your demos, and hope to meet up at LB Crafts some time, Judith x
Brilliant demoes at Ally Pally! You were excellent - I hope you come/go again!(Ooops!I don't know if I'm coming or going!!!)
Thank you for this tutorial, I will definitly have a go! I really like those roses!
Cardarian
Great tutorial and beautiful realistic roses. Thanks.
:)
Brilliant tutorial. I love these roses they are gorgeous. Love your blog. An inspiration. Thank you.
Beautiful !! thanks LInda
Great tutorial... always wanted to know how this was done... very clear
Frankie
xx
Great tutorial, thank you I'm going to try these on my little jars x tfs
This is a great tutorial ... very clear instructions, I have linked to it on my blog ... hope that is OK
Post a Comment